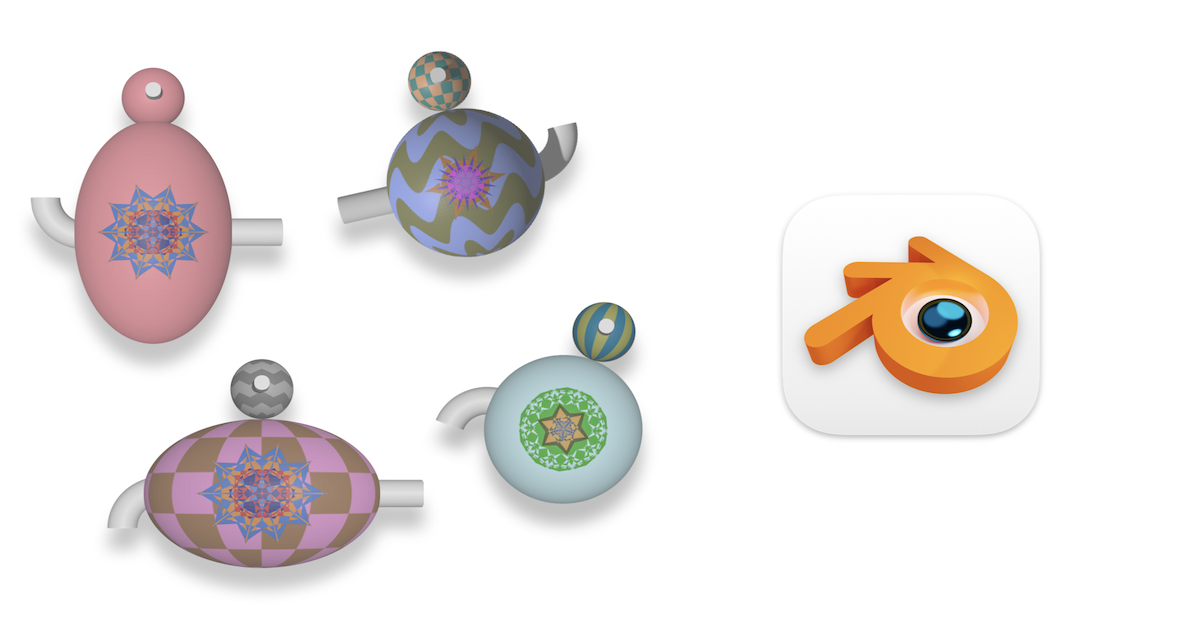
Quaddle2.0 - A Multidimensional 3D Stimuli for Cognitive Science Research
Paper under preparation, for any query please contact author Email. Please cite our arxiv paper if you use Quaddle2.0.
Introduction
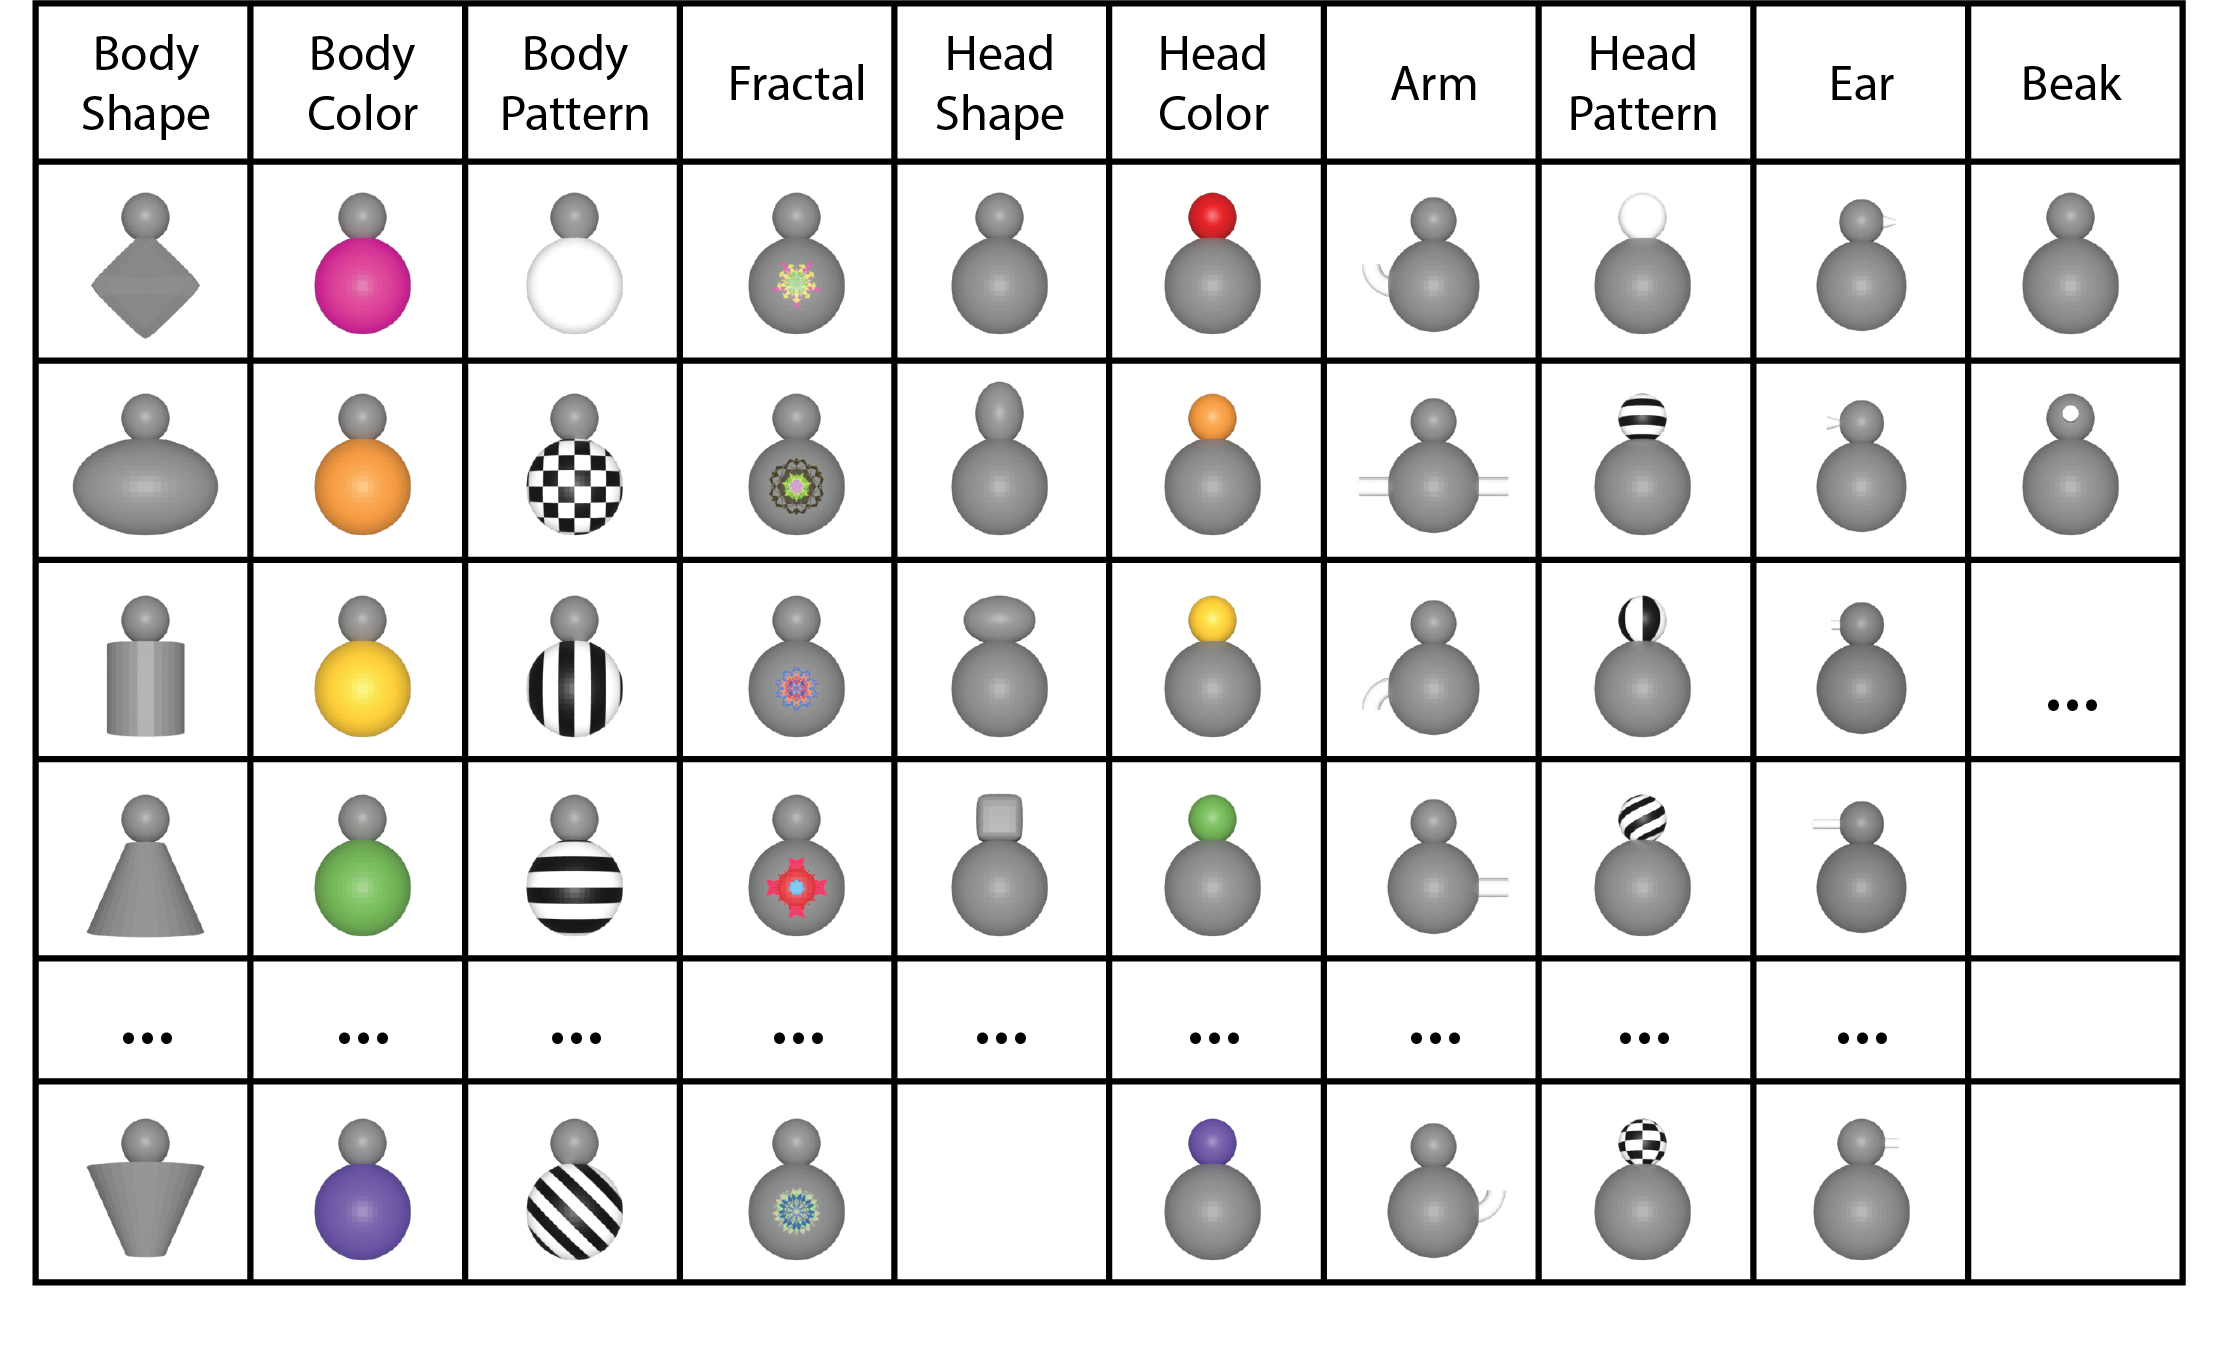
Quaddle2.0 is an open-source software program designed to help researchers in the field of cognitive science create and manipulate a wide range of stimuli for use in their studies. Developed using Blender, the popular 3D modeling software, Quaddle2.0 allows researchers to create complex, multi-dimensional stimuli that can be easily exported to a variety of file formats, including PNG and FBX. The program is designed to be intuitive and user-friendly, making it accessible even to researchers who may not have extensive experience with 3D modeling software. The program includes a wide range of features that allow users to manipulate and customize their stimuli, including the ability to adjust the shape, size, and color of objects, as well as the ability to add textures and other visual effects. The program can be used with a variety of other research tools, including Unity, Psychopy, and Psychtoolbox, making it easy to integrate into existing research workflows. With over 1.5 billion potential stimuli variations, researchers can use Quaddle2.0 to create a wide range of different stimuli for use in their studies, including visual, auditory, and tactile stimuli.
Dimensions Demo
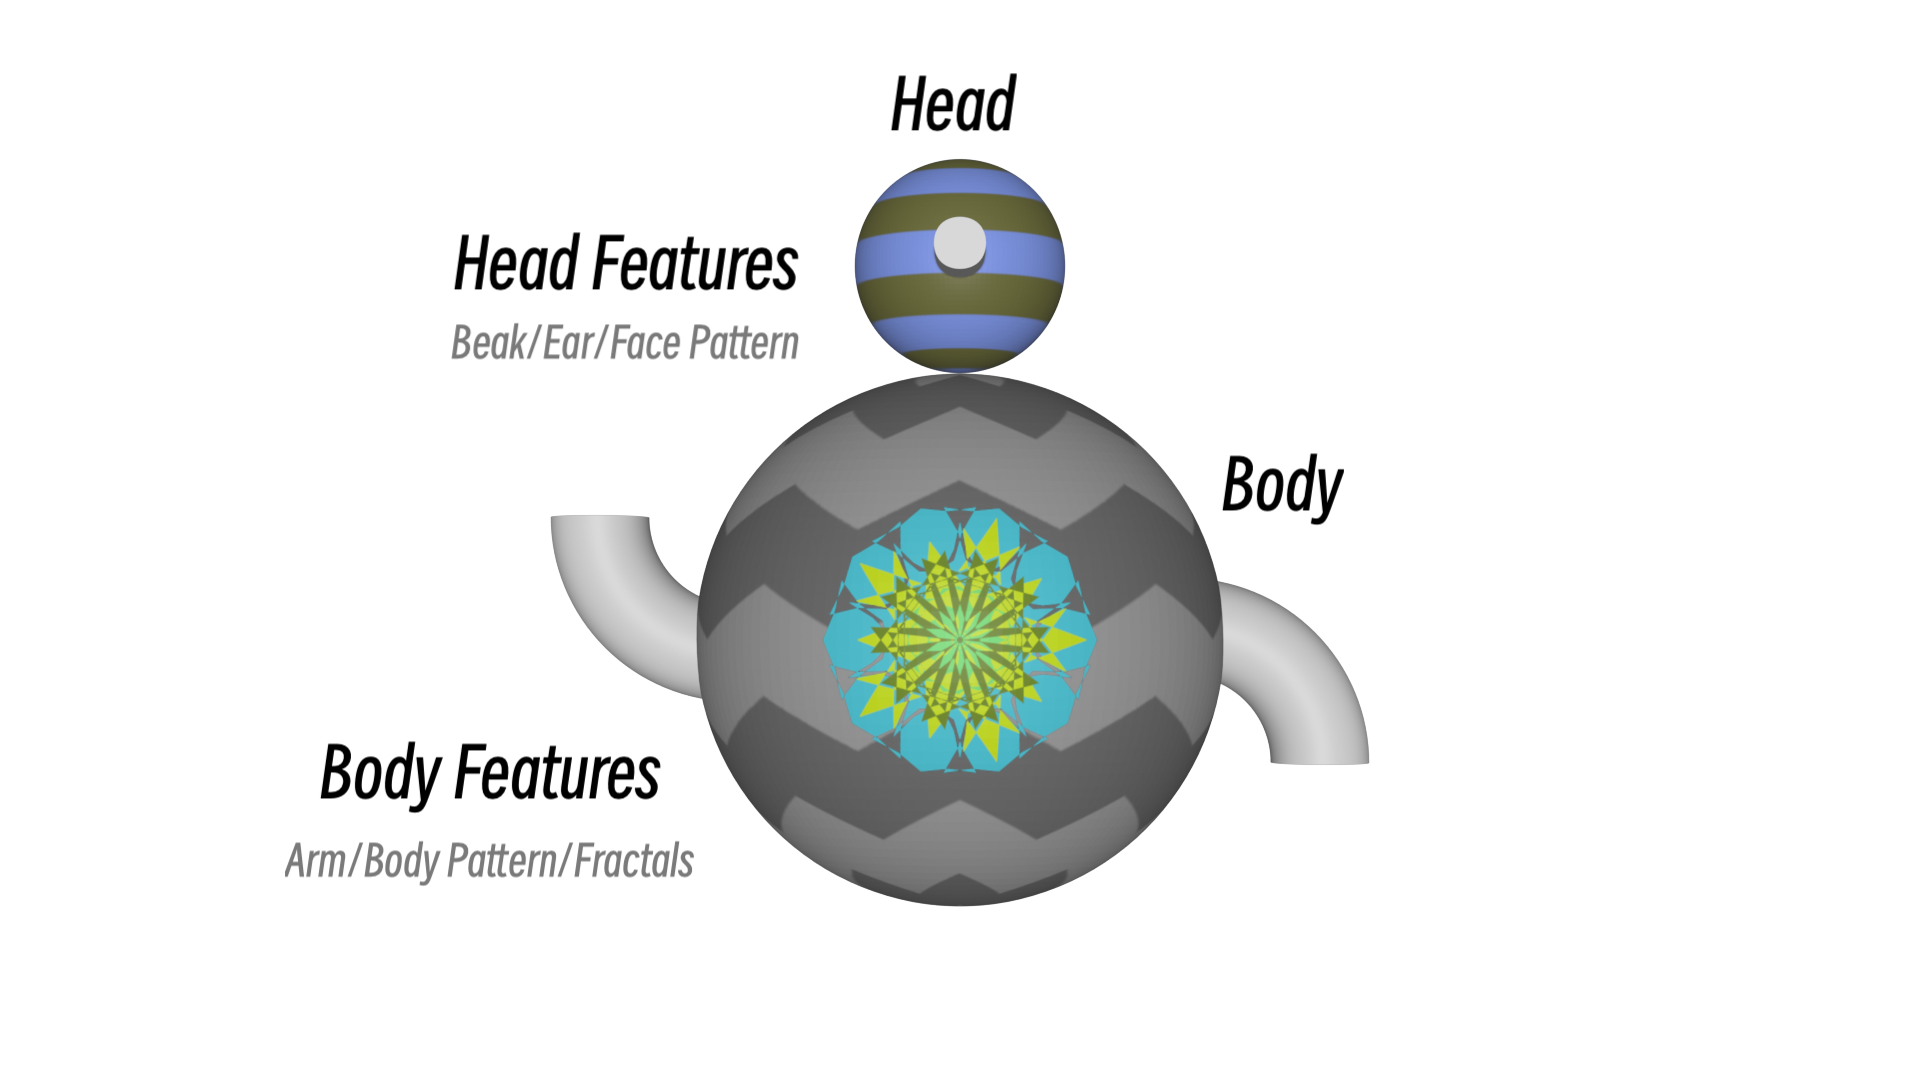
Quaddle 2.0 is a powerful 3D stimuli generation toolbox based on Blender, which has six main dimensions for creating custom 3D models. Here are examples of one quaddle and how its compositions in blender.
Download Blender & Set up Quaddle
Both Blender and Quaddle2.0 code are open-source.
All the source code of Quaddle2.0 can be found on our Github: Quaddle2.0 Github Repo.
To download blender, you can use this link for the latest version: Download Blender.
You can also refer to this youtube video for the process: 
Current Quaddle code only work with Blender version 3.4. Since newer version used different methods for link texture and color projection. You can find it at: Blender Archives
Getting Start
Set up Blender
Once open the Blender, you will see this UI:  You can open the
 makeQuaddle.blend file and its folder containing supplementary materials.
Then you can see the main page, containing everything you need when you generate your quaddle. 
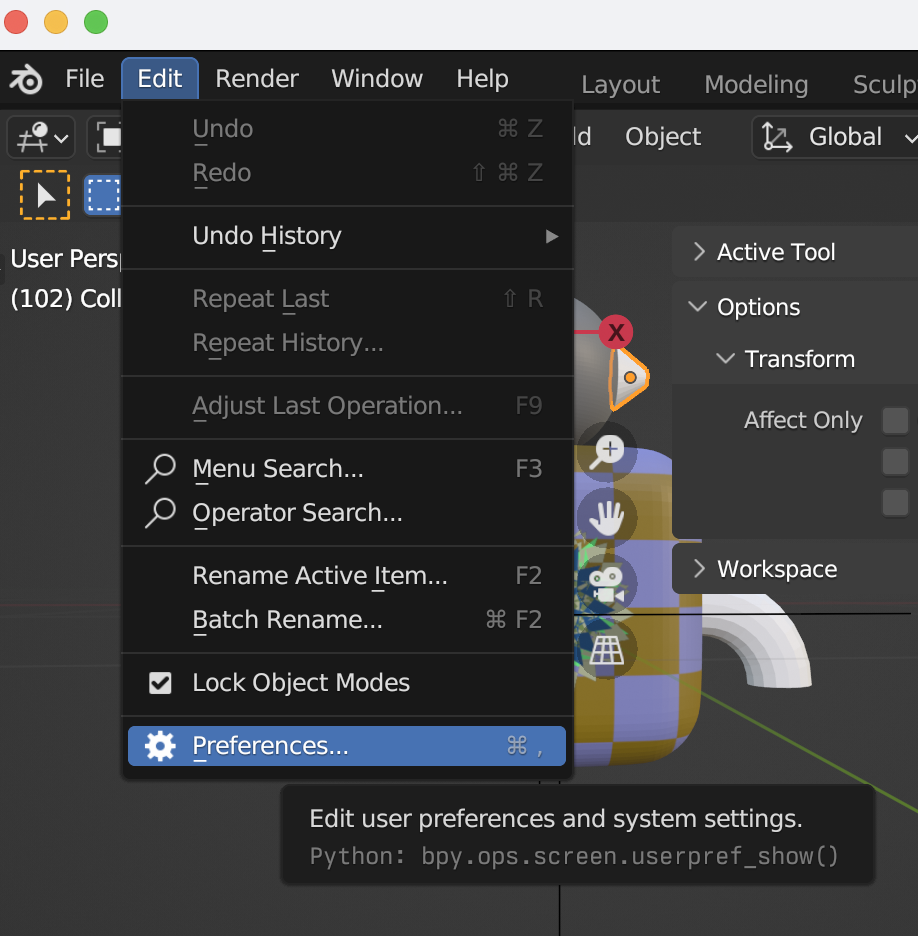
Let’s first set up the python script path you need to pass to the Blender. You can find preference: Edit -> Preference -> File Path  Please change the
 Data/Script to the path of Blender folder (where you store the scripts from github), and Asset Library add the path of assets (also in the folder you downloaded).
Now you can load scripts to it! Click Open Text button:  And run it by clicking the Run button .
When you run the script for the first time, you have to run all dependent scripts (imported scripts).
Basic Intro to Blender
There are many, many online materials for learning Blender, for example:
Blender Guru
Blender Official Youtube Channel
Blender Official Doc
Basic Intro to Blender Python
One of the key features of Blender is its support for Python scripting, which allows users to automate tasks and create custom tools. In this post, we’ll provide a basic introduction to Blender Python, including how to access and manipulate objects, create custom operators, and more.
Let’s start by creating a basic mesh object: a sphere:
1
2
3
bpy.ops.mesh.primitive_uv_sphere_add(radius=5.0, location = (0,0,0))
sphere = bpy.context.active_object
sphere.name = 'Sphere'
One of the most common tasks in Blender is accessing and manipulating objects. With Python, you can easily select, move, rotate, and scale objects in your scene. Here’s an example of how to select an object by name and move it along the x-axis:
1
2
3
4
5
6
import bpy

# Select object by name
obj = bpy.data.objects['Sphere']
# Move object along x-axis
obj.location.x += 1.0
As you noticed, object on the scene can be selected by bpy.context.active_object (select the last operated object) or bpy.data.objects['Sphere'] (select by name).
Another important function is Node, here is an example using node to add image texture on the object:
1
2
3
4
5
6
7
8
9
10
11
12
13
14
15
16
import bpy

# Load an image texture
image_path = "/path/to/your/image.png"
image = bpy.data.images.load(image_path)

# Create a new material
material = bpy.data.materials.new("ImageTextureMaterial")
material.use_nodes = True

# Access the material's node tree
node_tree = material.node_tree

# Add an image texture node
image_texture_node = node_tree.nodes.new("ShaderNodeTexImage")
image_texture_node.image = image
Connect Blender with your current research workflow
One of the most powerful ways to connect Blender with your workflow is by running Blender outside of its GUI. This allows you to automate tasks, integrate Blender into your existing workflow, and use Blender as a rendering engine. One example of this is connecting Quaddle Generator to your MATLAB workflow. By doing so, you can generate stimuli without the need for a graphical interface, streamlining the process and making it more efficient.
You simply need to add following lines:
1
2
3
4
5
6
7
8
9
10
% Make Quaddle
export_png = 'True';
export_fbx = 'False';
blender_path = '/Applications/Blender.app/Contents/MacOS/Blender'; % Change this to your Blender path
blender_file_path = '/Users/wenxuan/Documents/Blender/makeQuaddle.blend';
python_script = '/Users/wenxuan/Documents/Blender/parser.py'; % Change this to your Python script path
input_path = iPath;
output_path = [iPath '/'];
command = sprintf('"%s" --background "%s" --python "%s" -- --input_path "%s" --output_path "%s" --export_fbx "%s" --export_png "%s"', blender_path, blender_file_path, python_script, input_path, output_path, export_fbx, export_png);
system(command);
We also provide you a function which allows you specify feature, similarity, number of quaddles, output format in MATLAB, and generate quaddles based on your requirements.
Beyond the Default Set
Add more accessories?
Yes! Users can add more accessories (arm, beak, ear) easily by modifying the respective python function. In the main.py, the addArm function in it allows users to add arms to the front and back side of the Quaddle body. If you need more “3D-ish” object you can start from that function.
Morphing
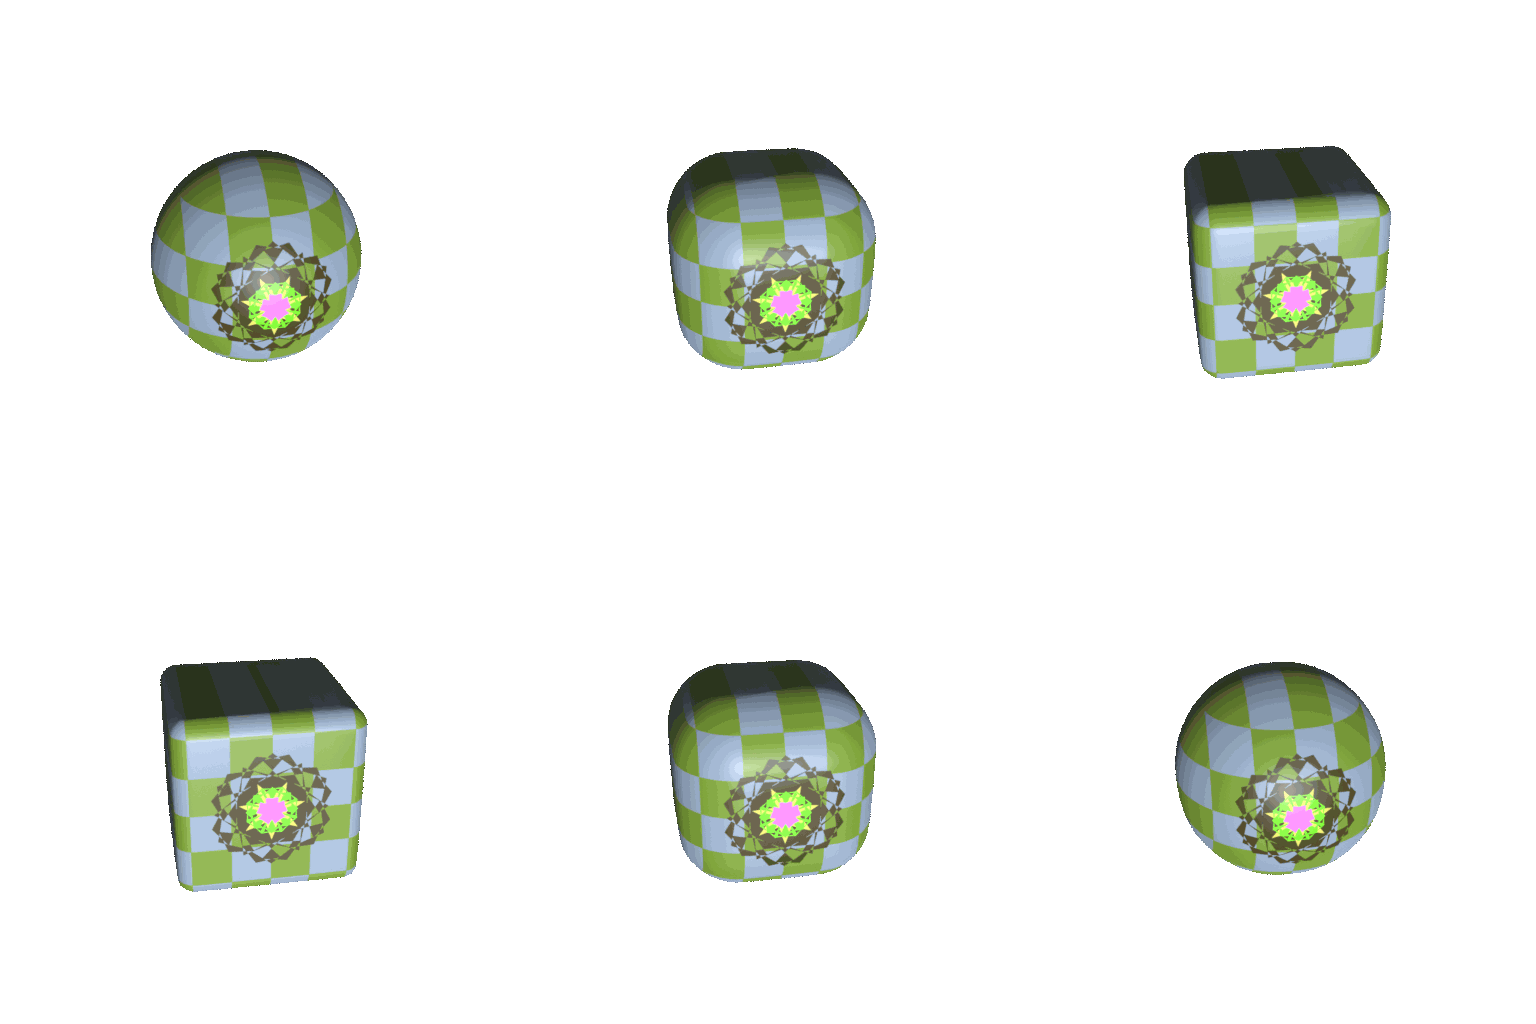
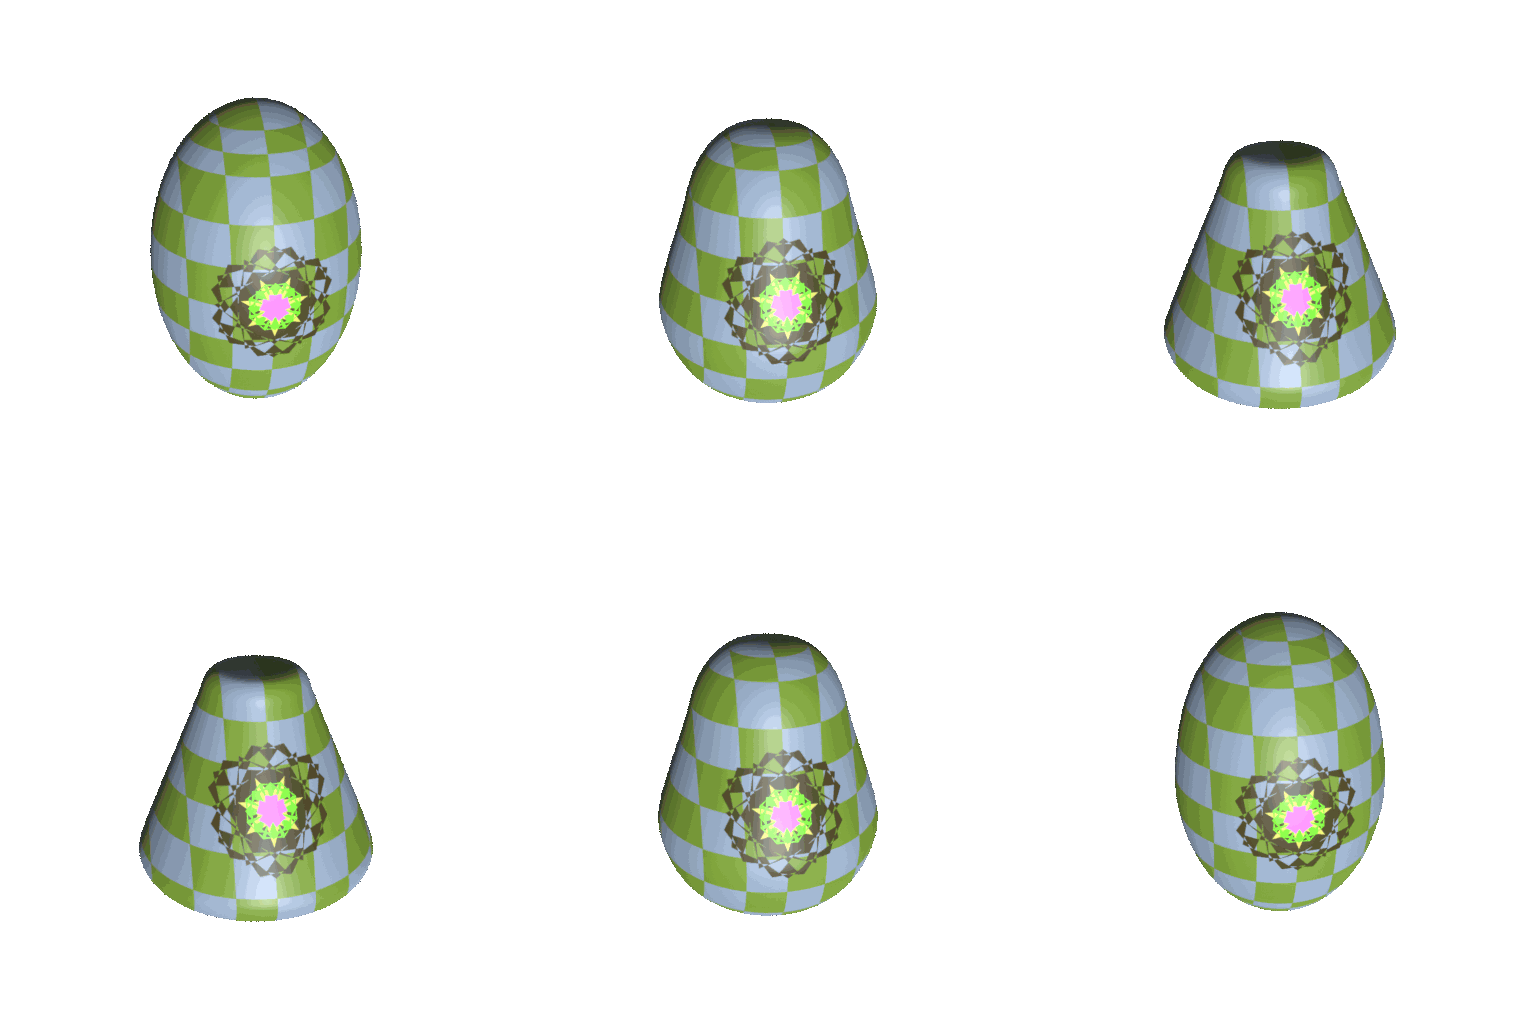
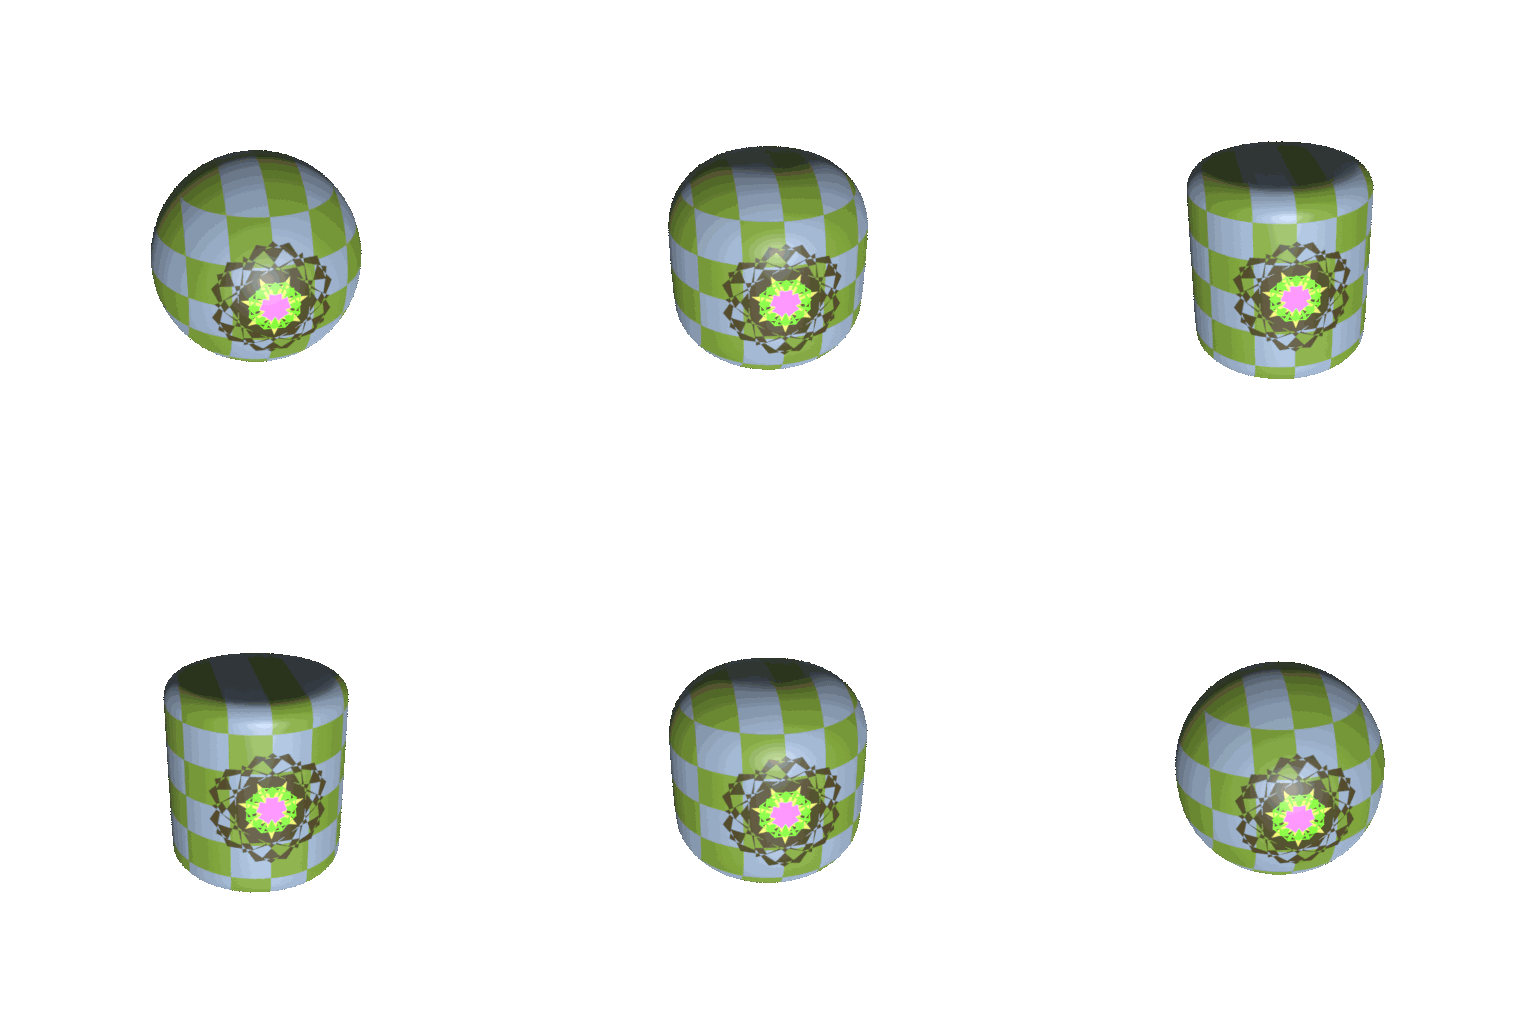
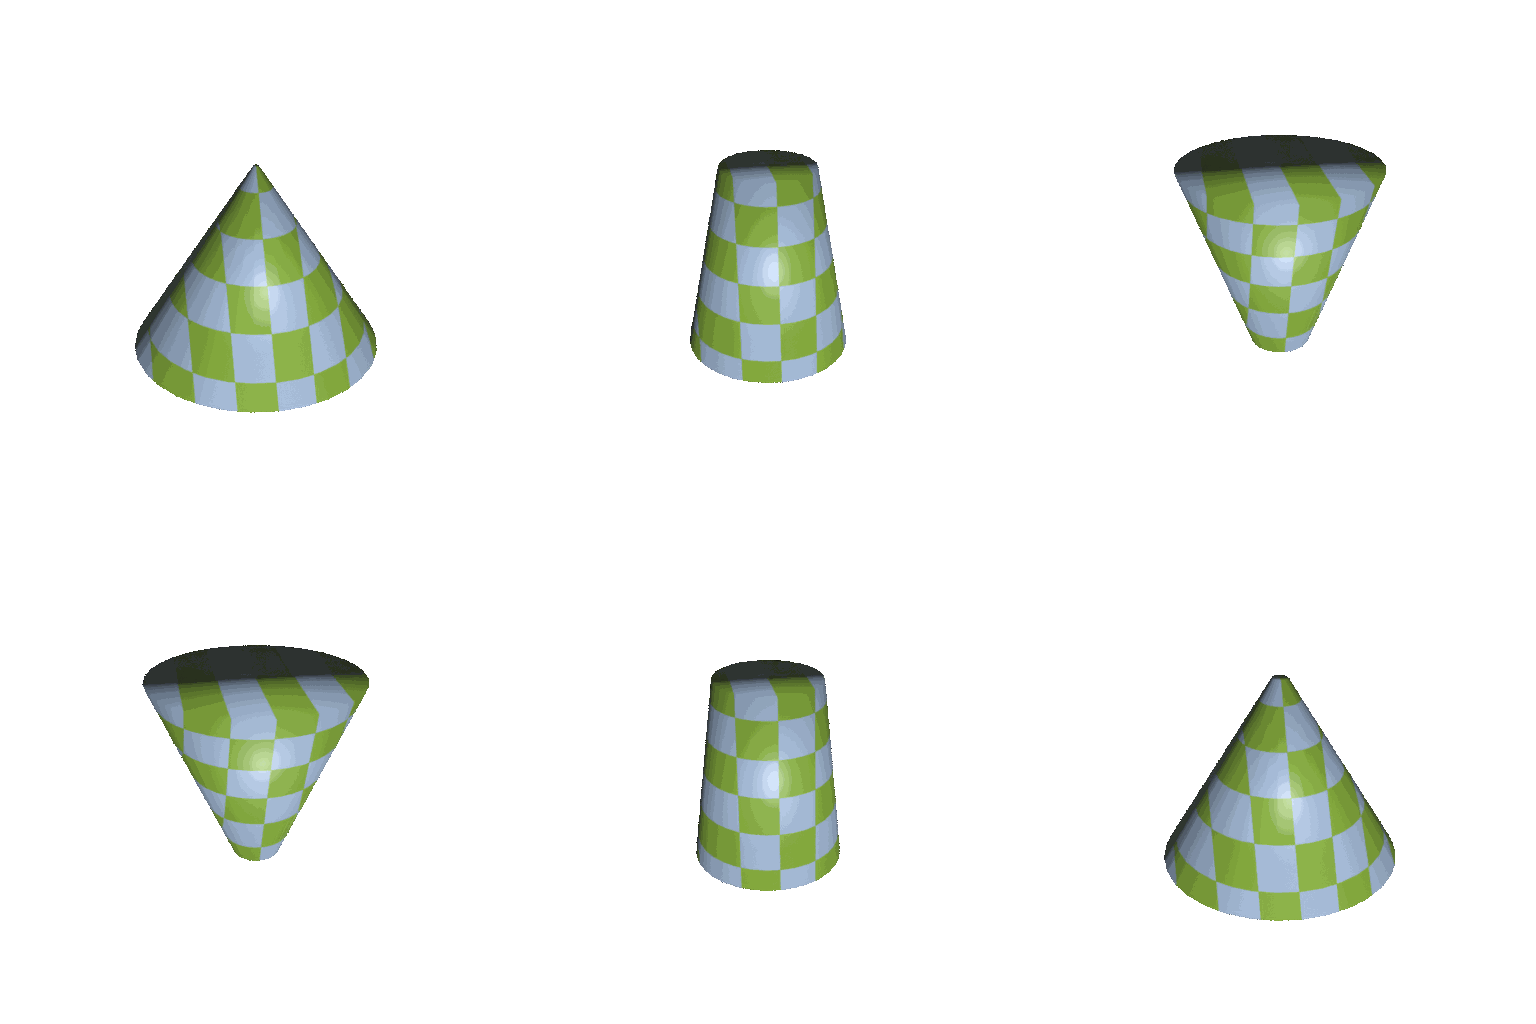
Quaddle 2.0 features a robust parametric morphing system that allows for dynamic and continuous transformations of a Quaddle’s geometry and patterns. These capabilities enable the creation of diverse and unique characters from a single base model.
Parametric Control
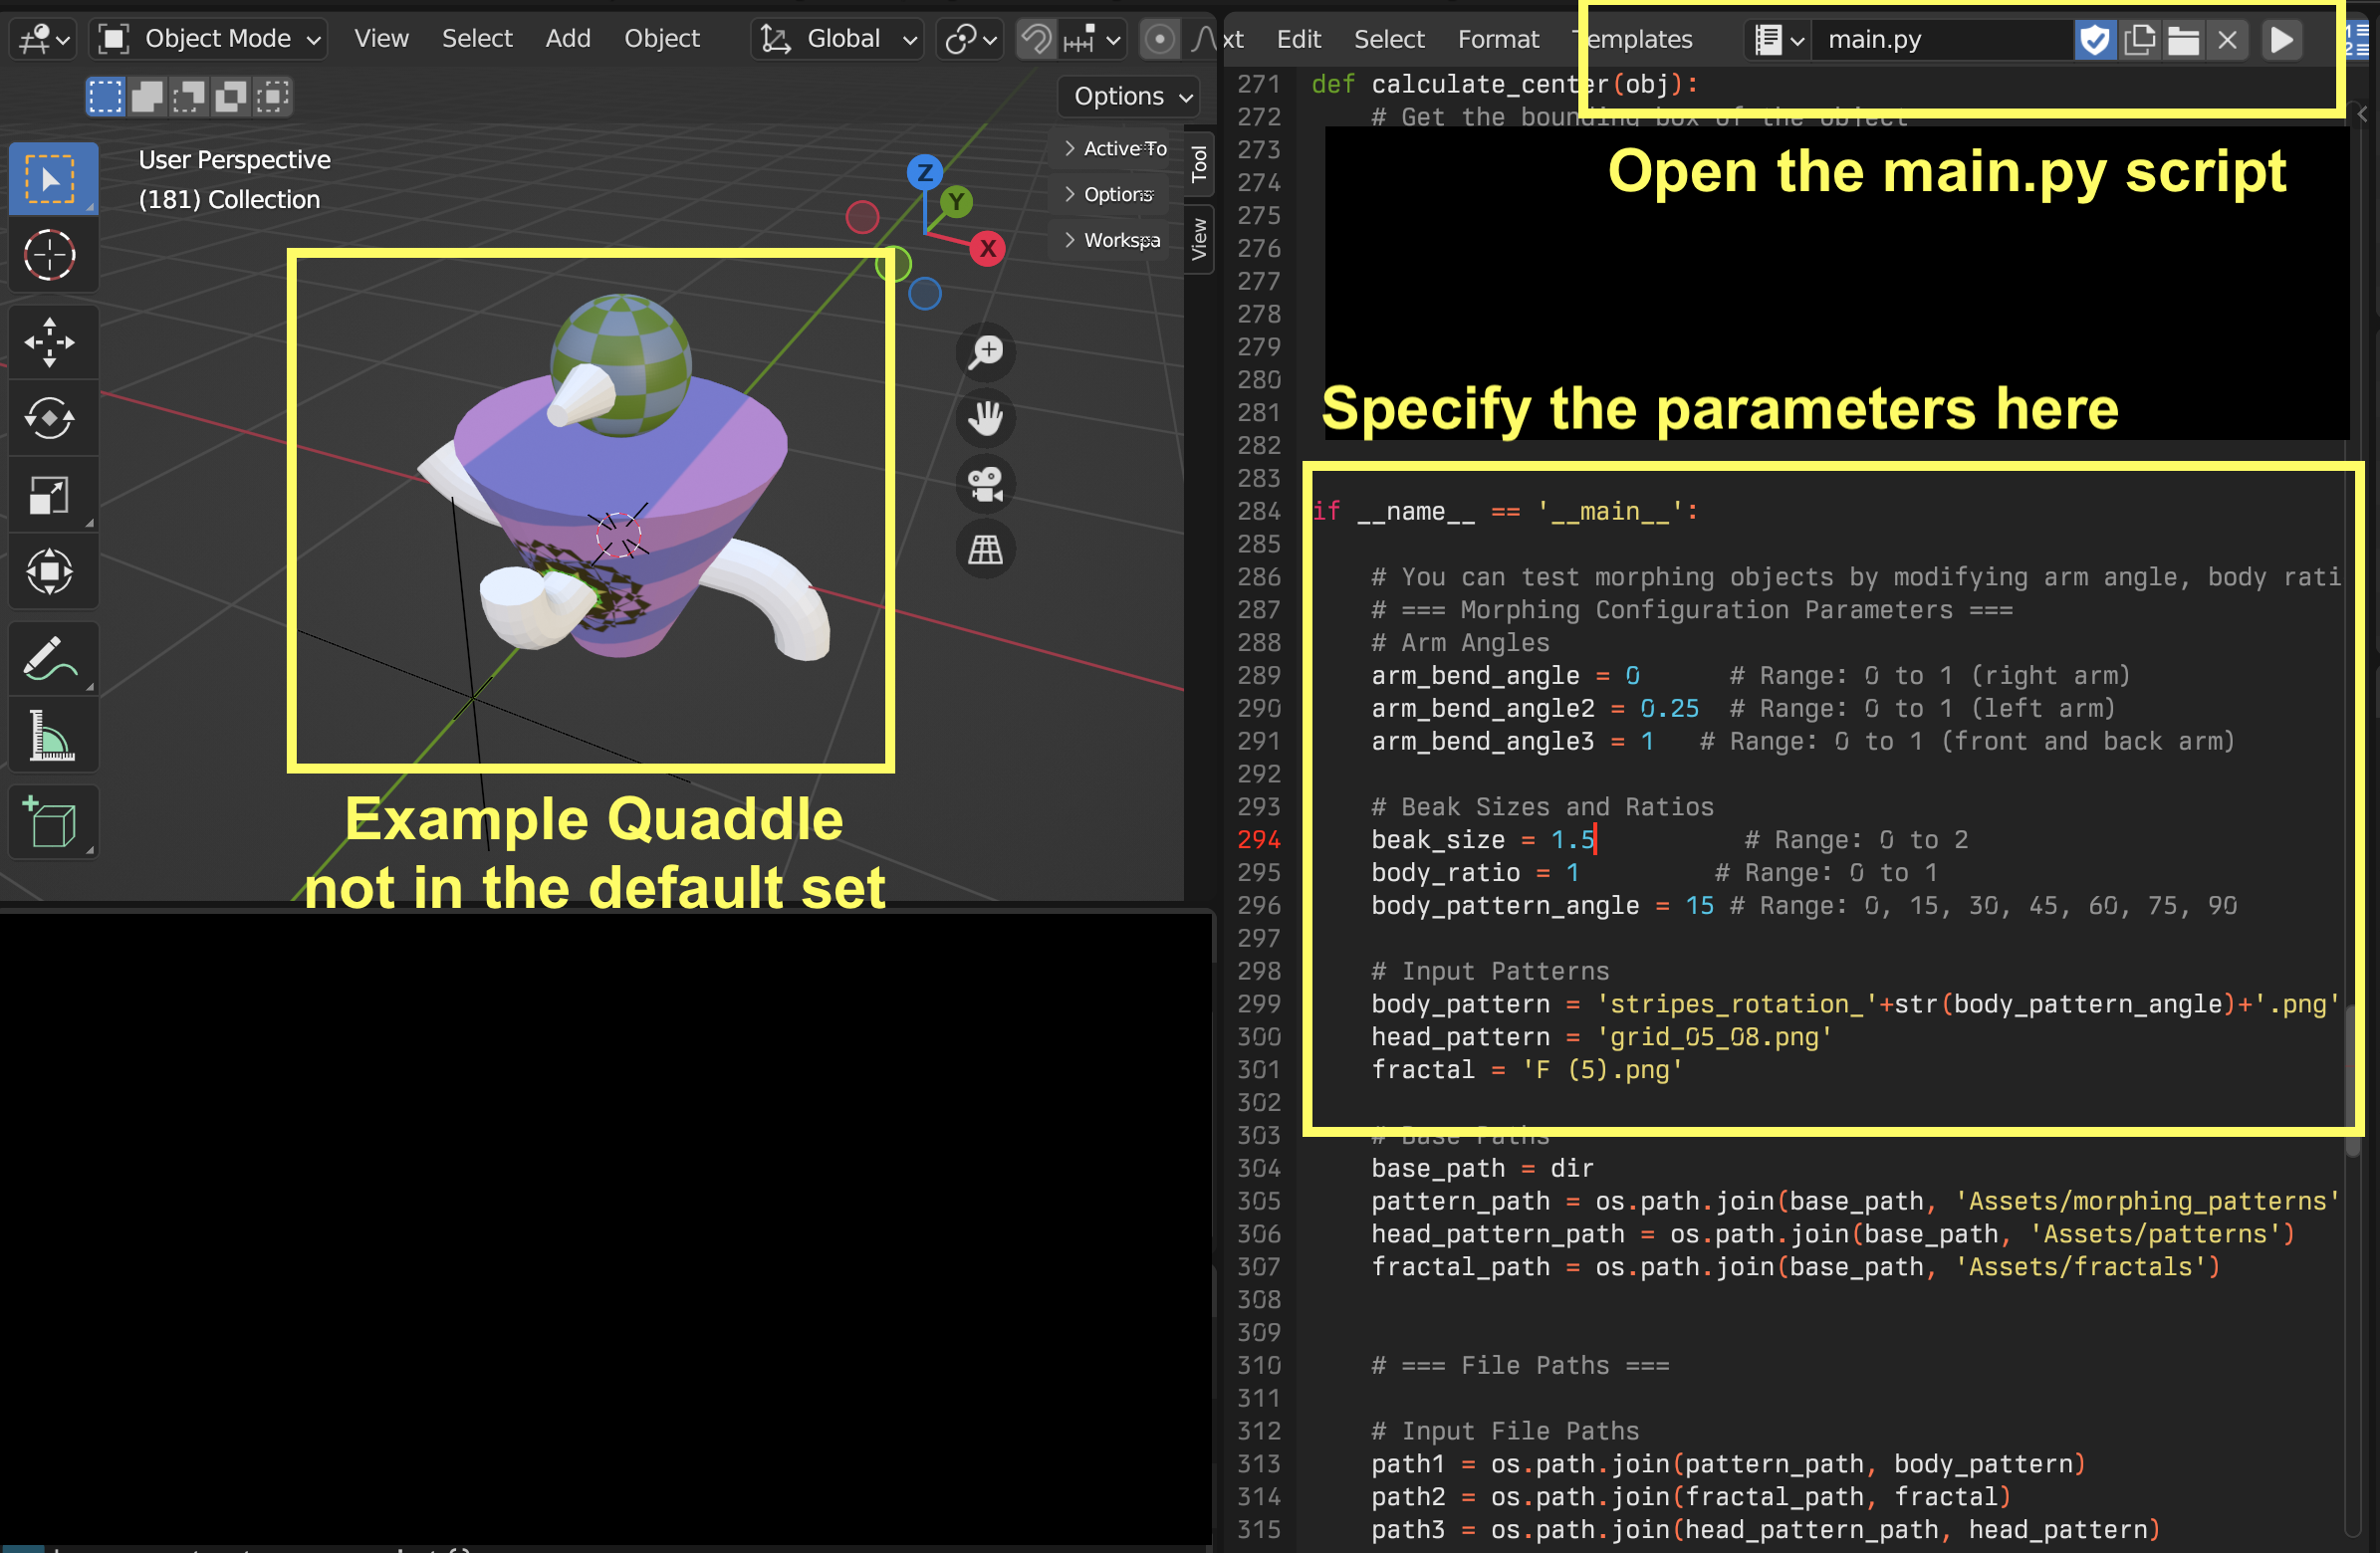
Users can manipulate several key features of a Quaddle’s design by adjusting specific parameters within the project’s code. An example implementation of these controls can be found in main.py.
- Body Shape: The primary body can be morphed from a cylindrical to a frustum shape by adjusting the
body_ratioparameter, which accepts a float value between 0 and 1. - Beak Size: The prominence of the beak is controlled by the
beak_sizeparameter, using a scale from 0 to 2. - Arm Angle: The bend in the Quaddle’s arms can be modified with the
arm_bend_angleparameter, which takes a value from 0 to 1.
These parameters can be adjusted in real-time to create fluid animations, as demonstrated in the continuous morphing example below.
Pattern Morphing
In addition to geometric transformations, the surface patterns on a Quaddle’s body are also morphable. We provide an example Jupyter Notebook, morphPatternImage.ipynb, located in the PatternGeneration/ folder, which demonstrates how to dynamically alter a pattern’s color and stripe angle.
Advanced Creative Morphing
Update (June 8, 2025, version e90b34d): A new script, creativeMorphing.py, has been introduced to enable more complex and creative morphing between entirely different body shapes. This method generates a morphable Quaddle 2.0 body that can be integrated into the main codebase, allowing for the addition of standard accessories to the custom-morphed shape.
This advanced function allows for seamless transitions between two distinct mesh primitives. Below are several examples generated using this new script.
Note: The
creativeMorphing.pyscript currently operates on native mesh data. To accommodate this, the method for generating cones within this script differs from the one originally used increateObject.py.
Trouble Shooting
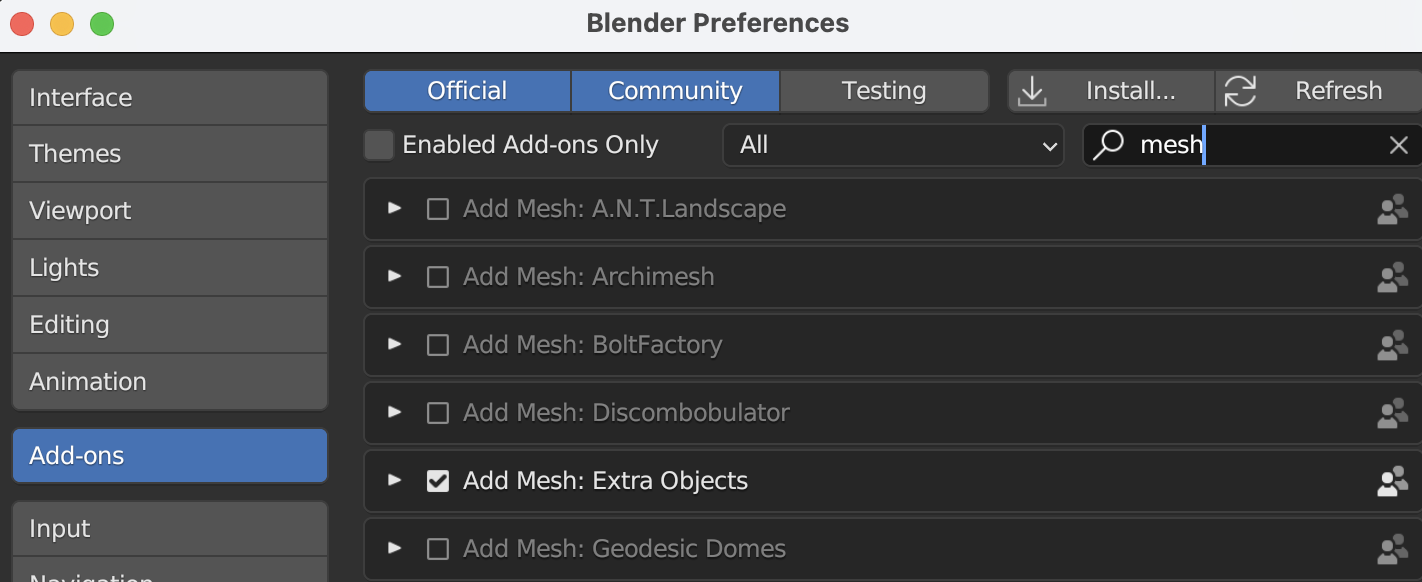
AttributeError: Calling operator “bpy.ops.mesh.primitive_round_cube_add” error, could not be found
For the rounded cube, we used Blender add-on. Please turn it on by Edit -> Preference-> Add-ons
Copyright (c) 2024, Thilo Womelsdorf This file is part of the Quaddle 2.0, see https://m-use.psy.vanderbilt.edu/quaddles-2/ for documentation and details. Matlab scripts and Blender scripts associated with Quaddle 2.0 are free software: you can redistribute it and/or modify it under the terms of the GNU General Public License as published by the Free Software Foundation, either version 3 of the License, or (at your option) any later version. Quaddle2.0 matlab scripts and blender scripts are distributed in the hope that it will be useful, but WITHOUT ANY WARRANTY; without even the implied warranty of MERCHANTABILITY or FITNESS FOR A PARTICULAR PURPOSE. See the GNU General Public License for more details. A copy of the GNU General Public License can be found at http://www.gnu.org/licenses/
Support and Community
Contact Author
Contact Attention-Circuits-Control Lab
Special Thanks to:
