Quaddle2.0: A Multidimensional 3D Stimuli for Cognitive Science Research
Getting Start
Set up Blender
Once open the Blender, you will see this UI:
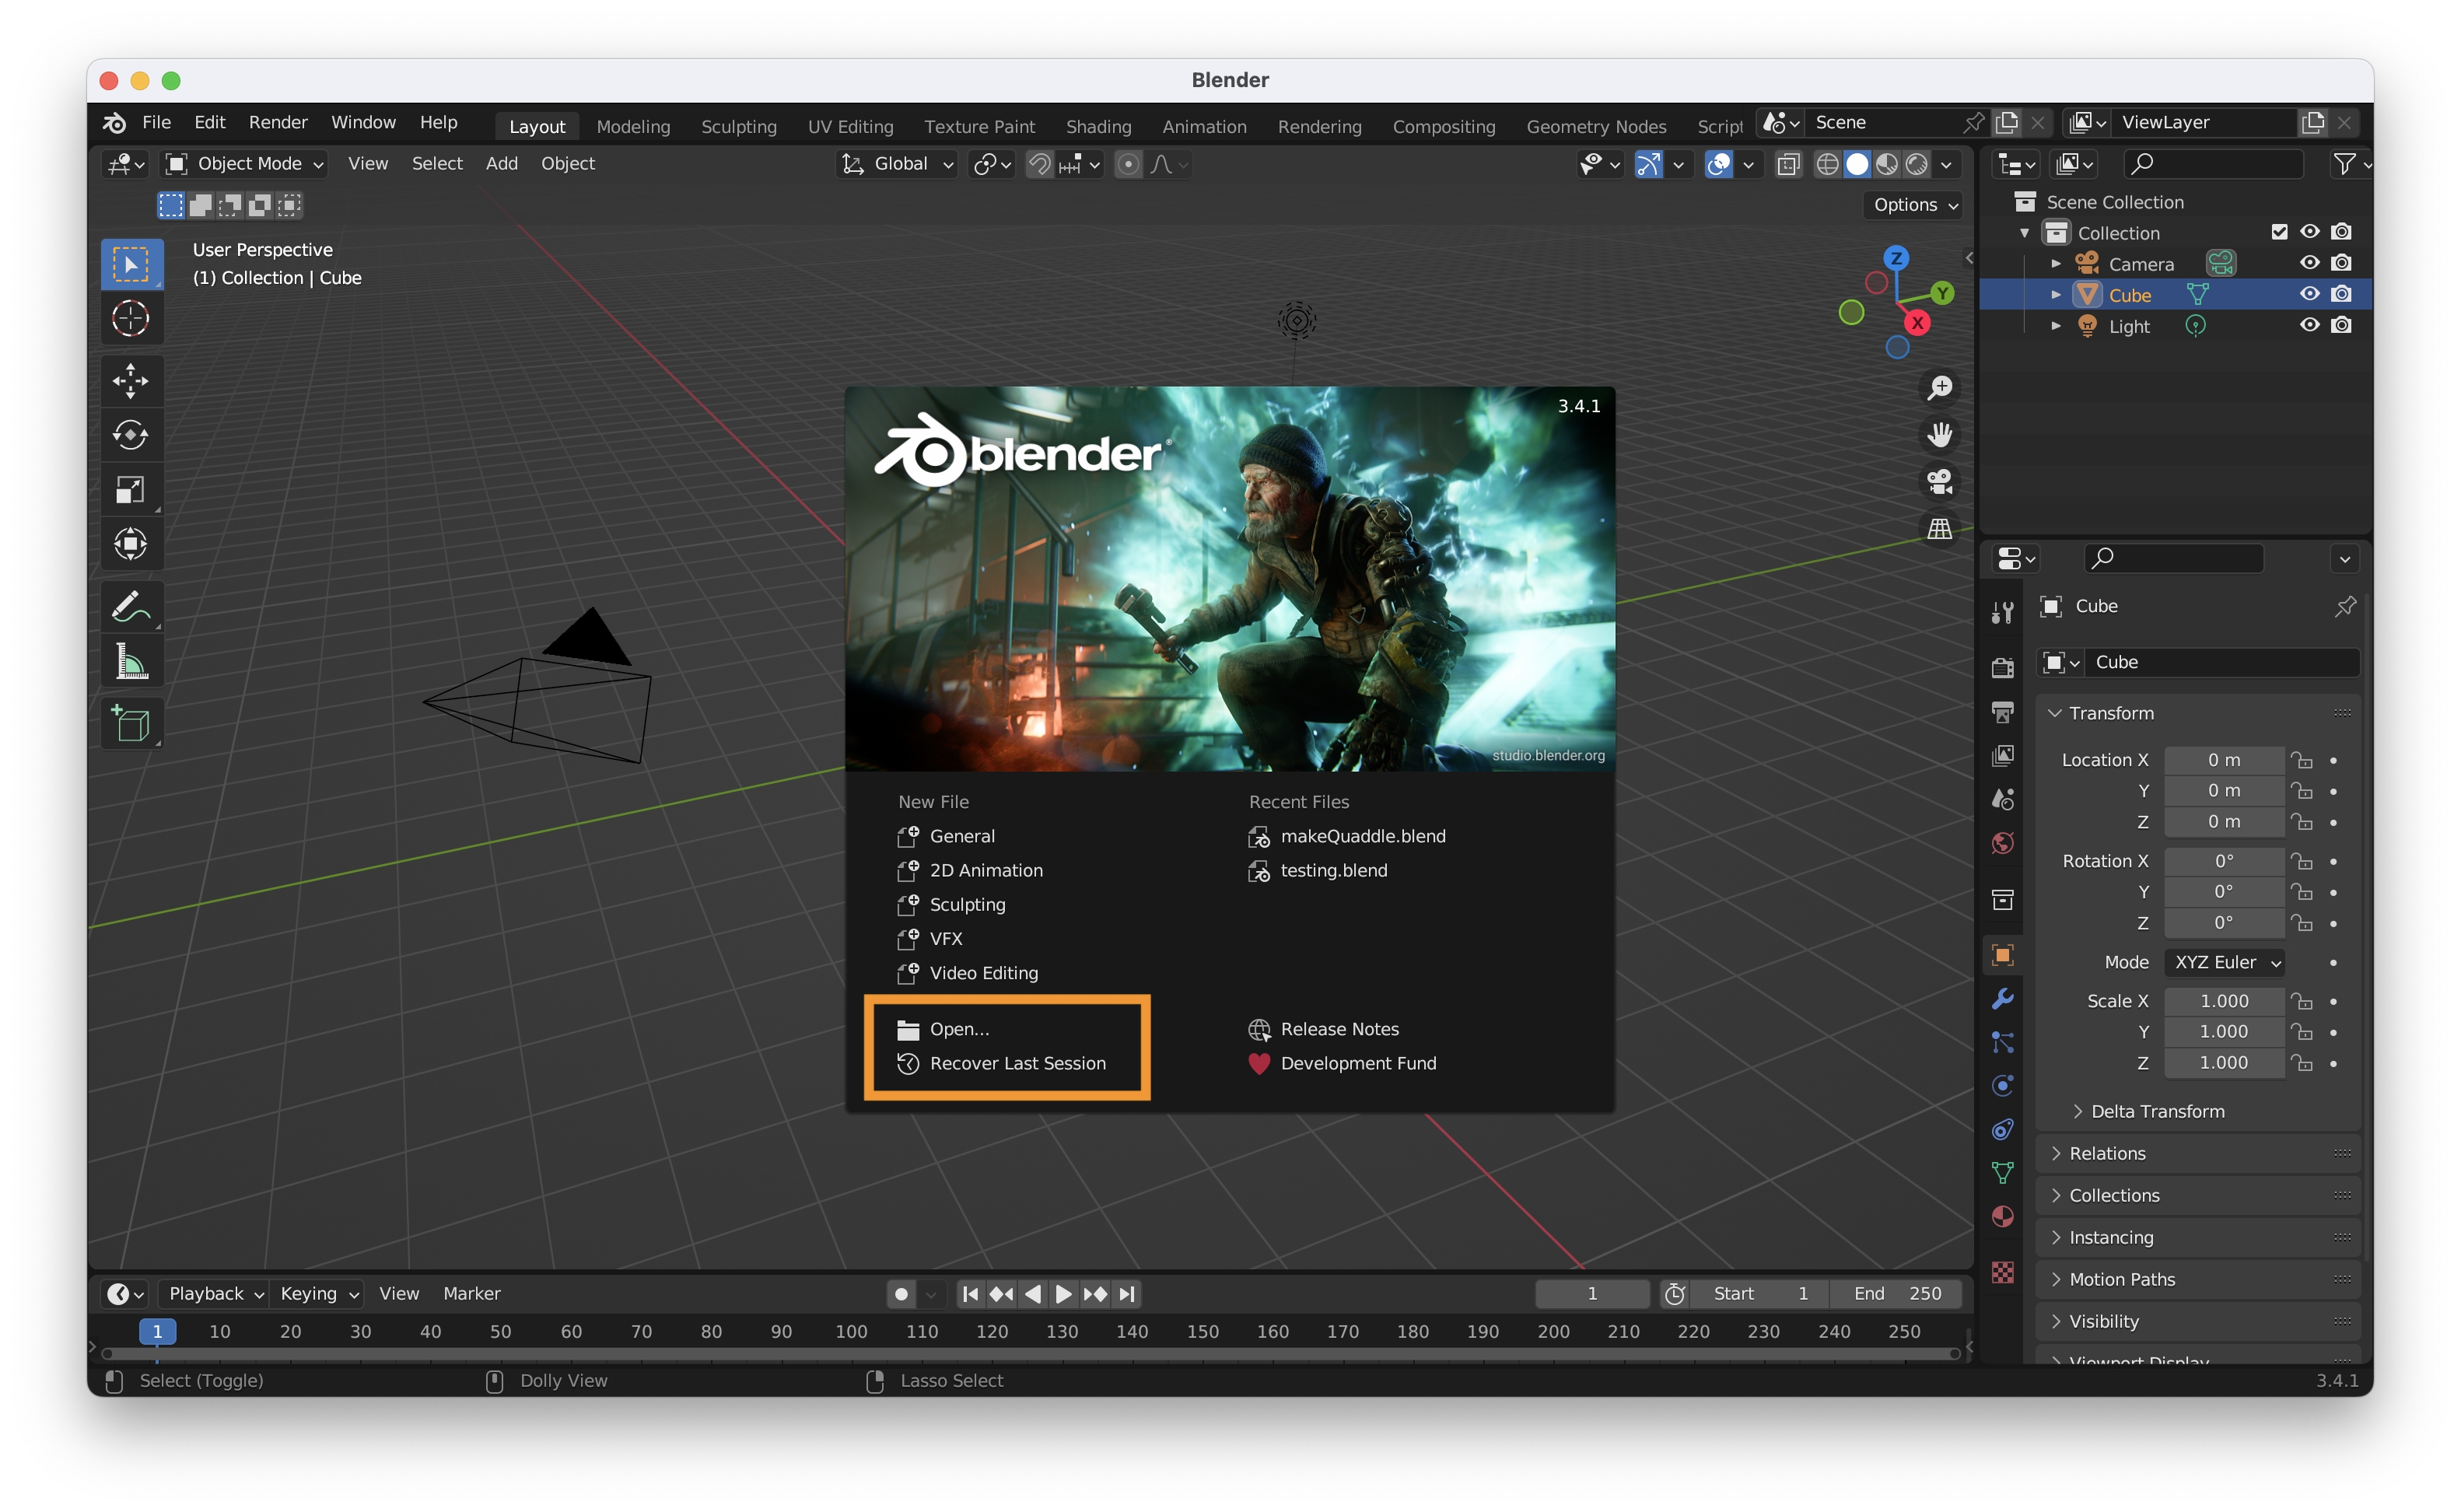 You can open the
 makeQuaddle.blend file and its folder containing supplementary materials.
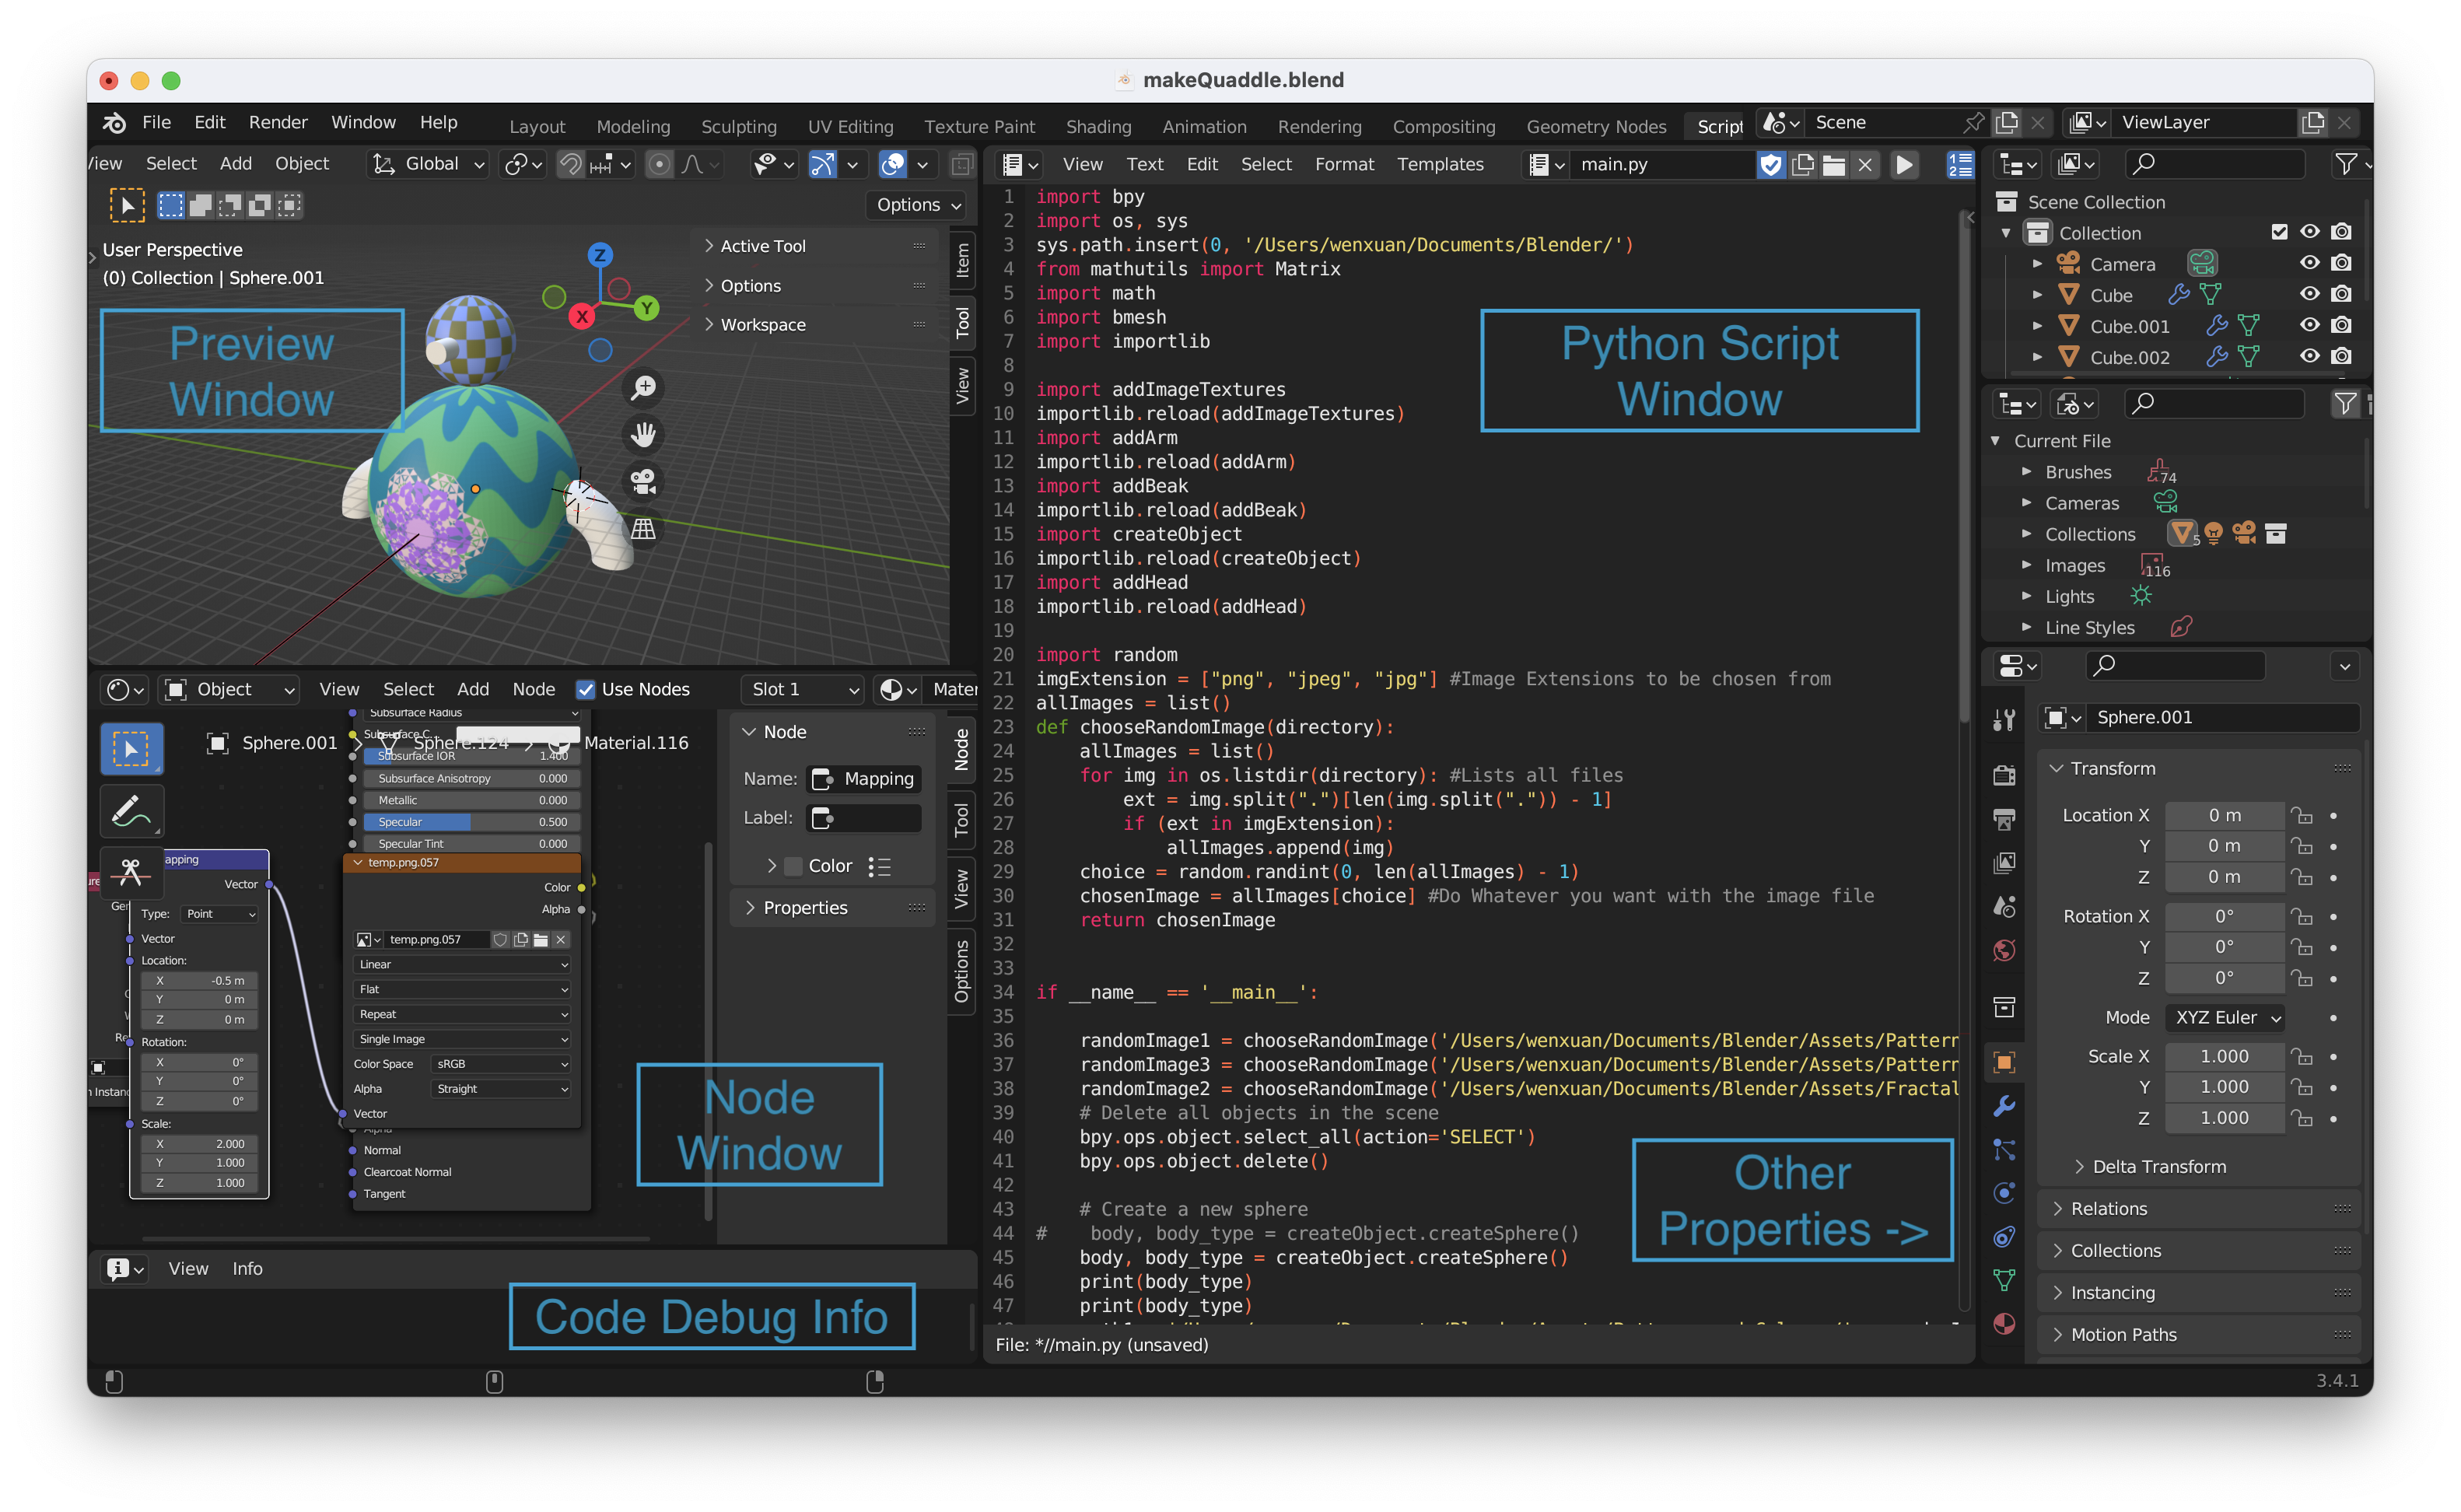
Then you can see the main page, containing everything you need when you generate your quaddle.
Let's first set up the python script path you need to pass to the Blender. You can find preference: Edit -> Preference -> File Path
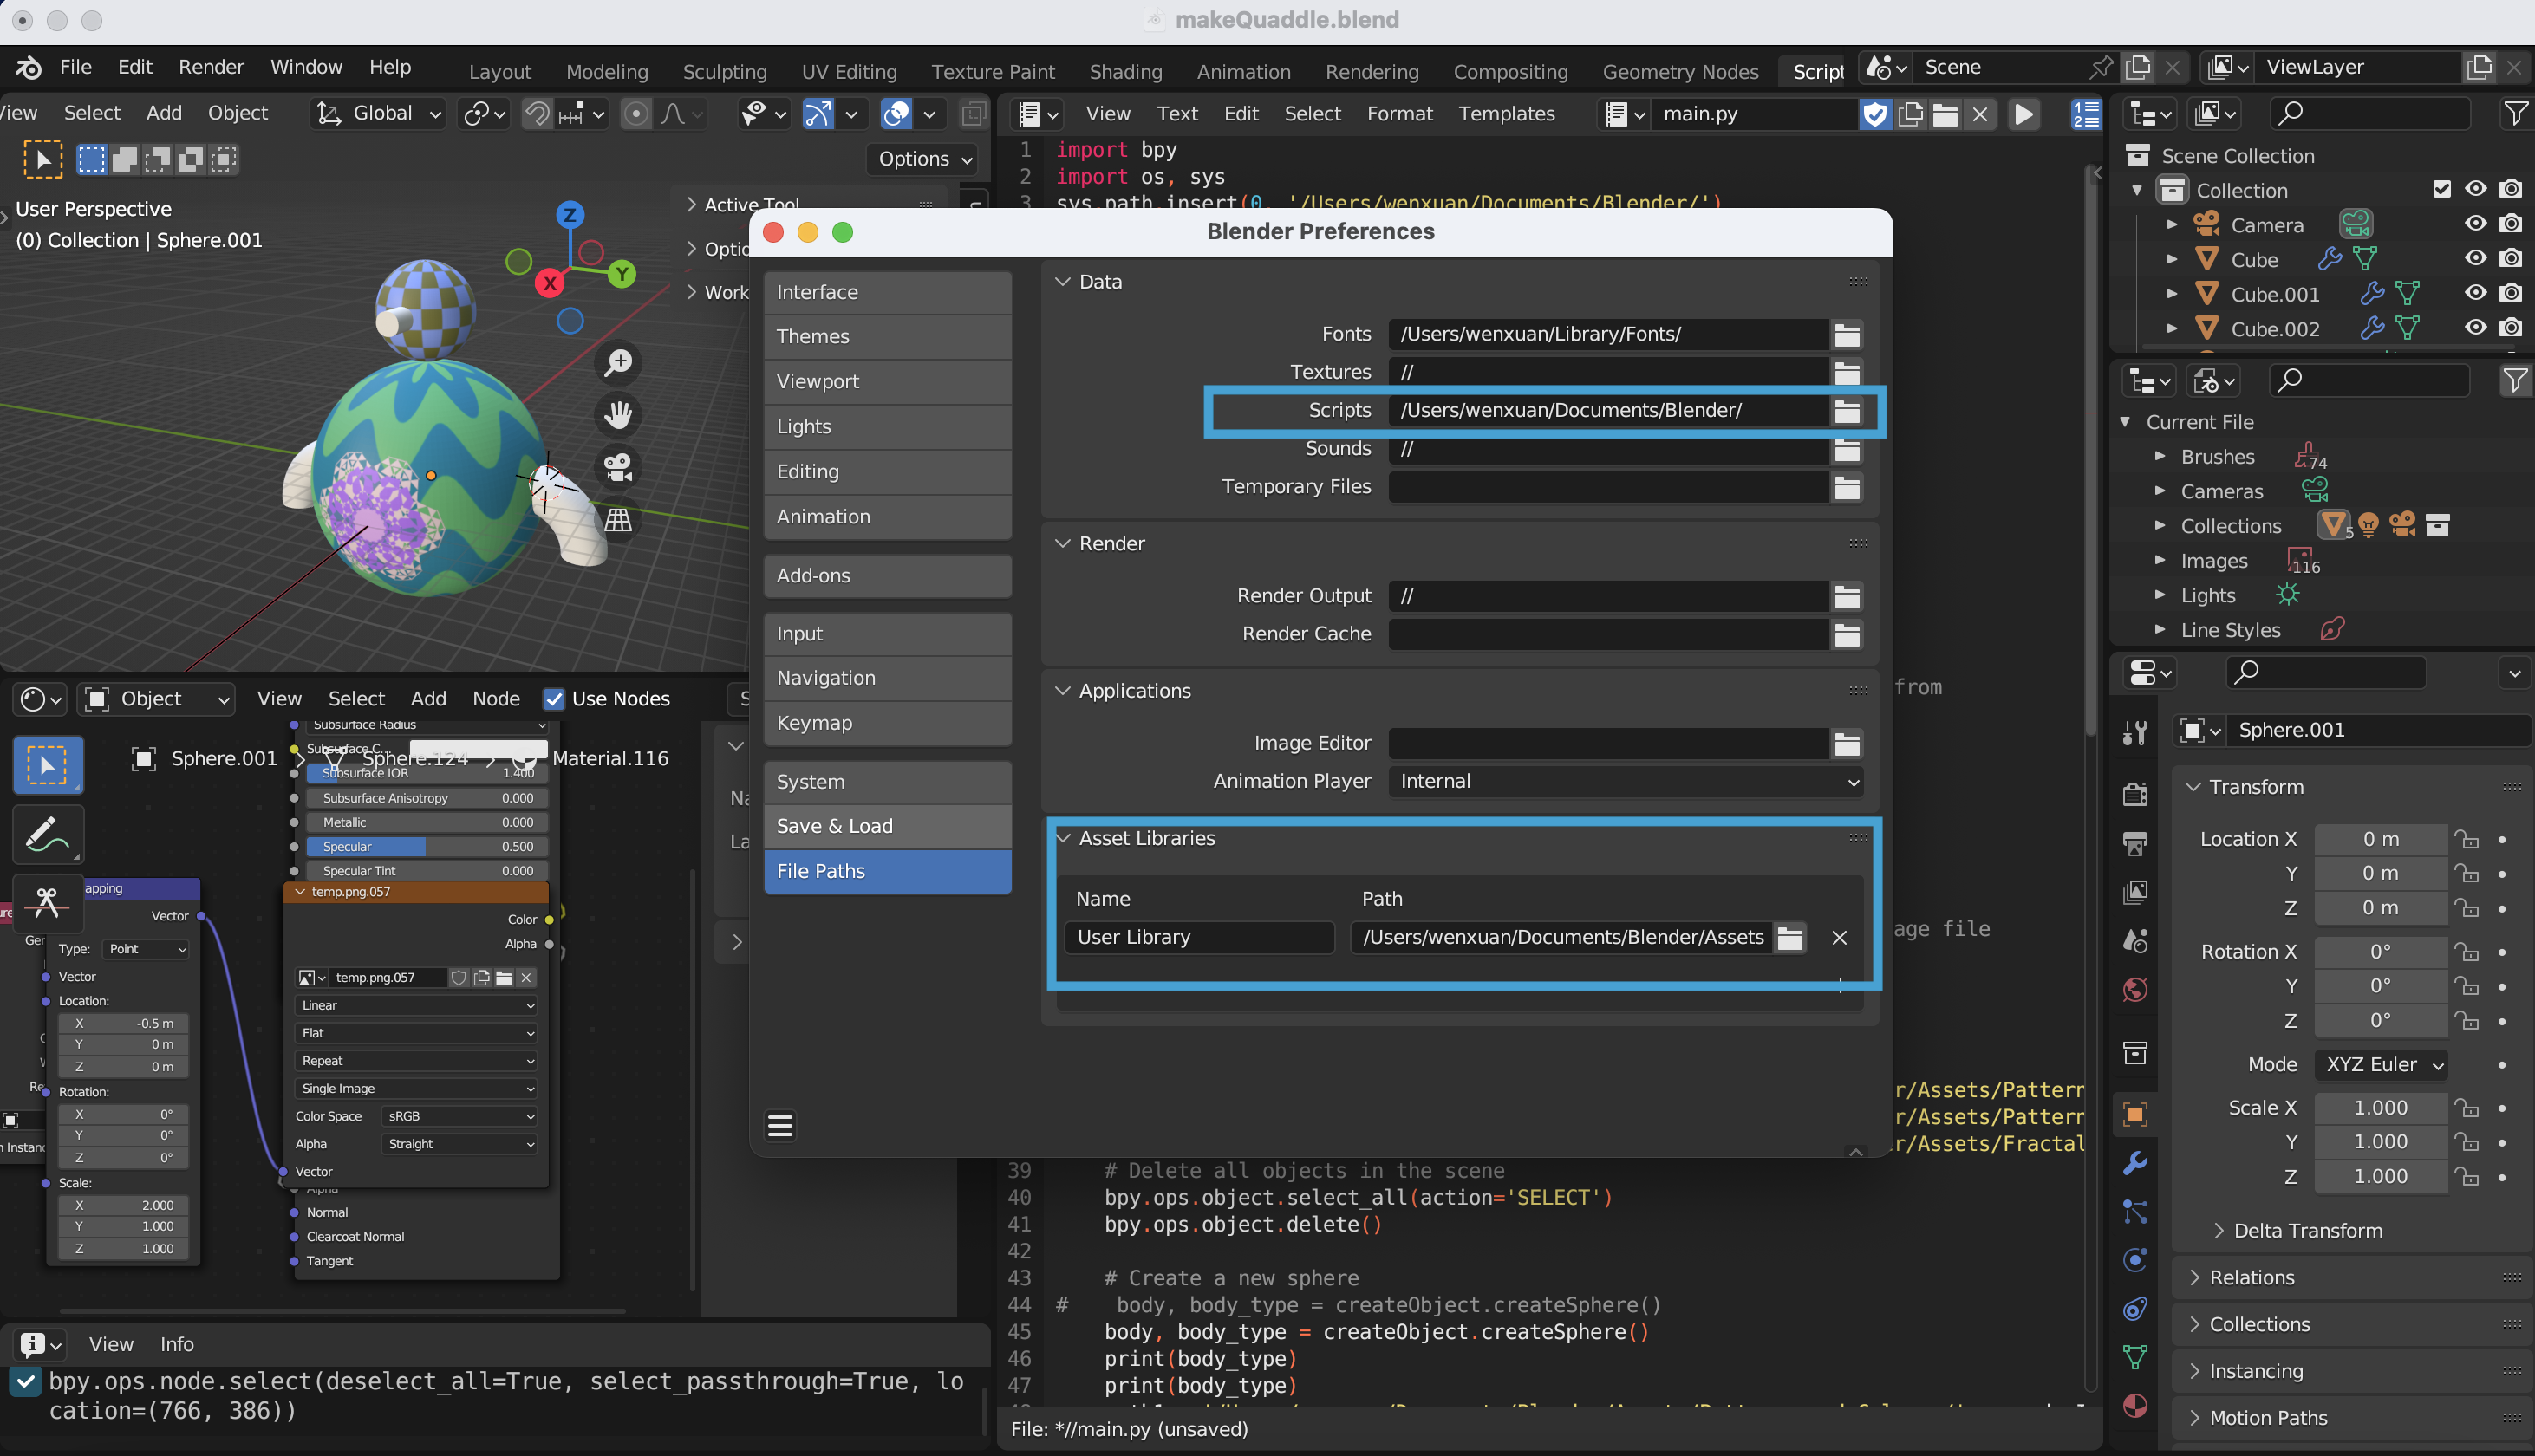 Please change the
 Data/Script to the path of Blender folder (where you store the scripts from github), and Asset Library add the path of assets (also in the folder you downloaded).
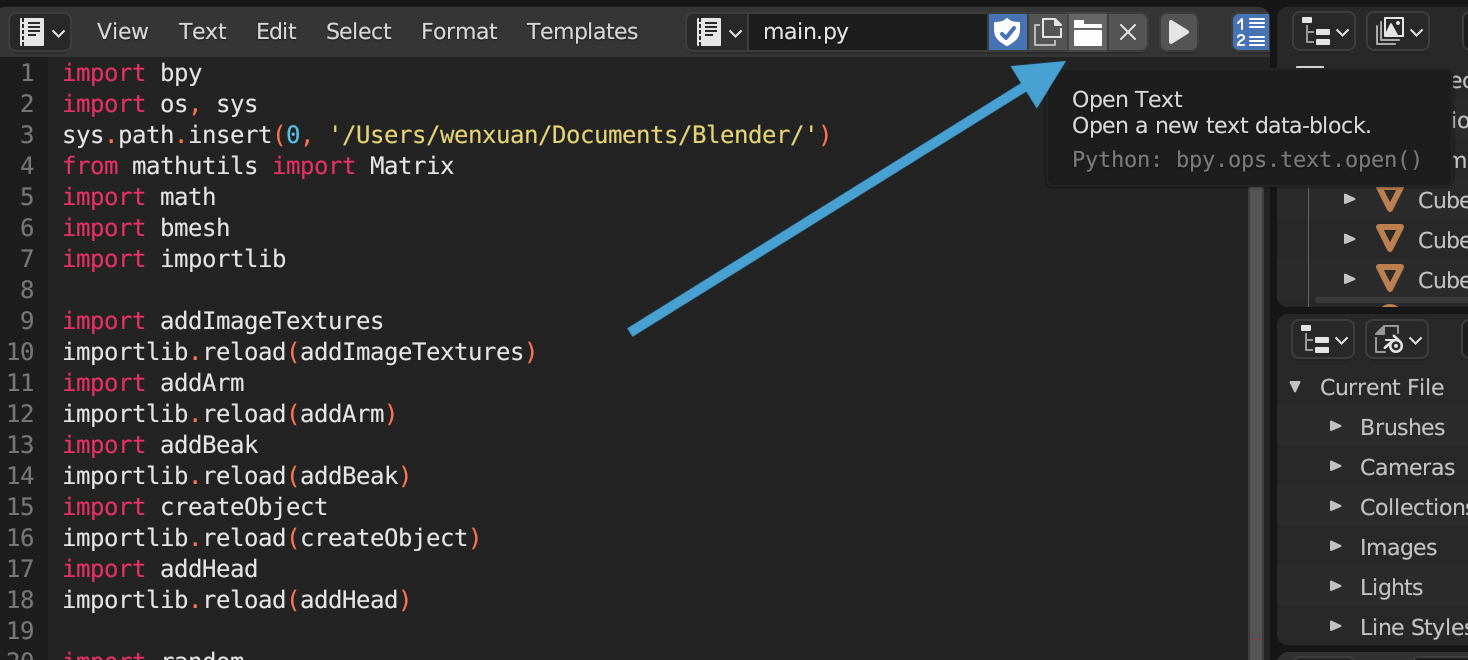
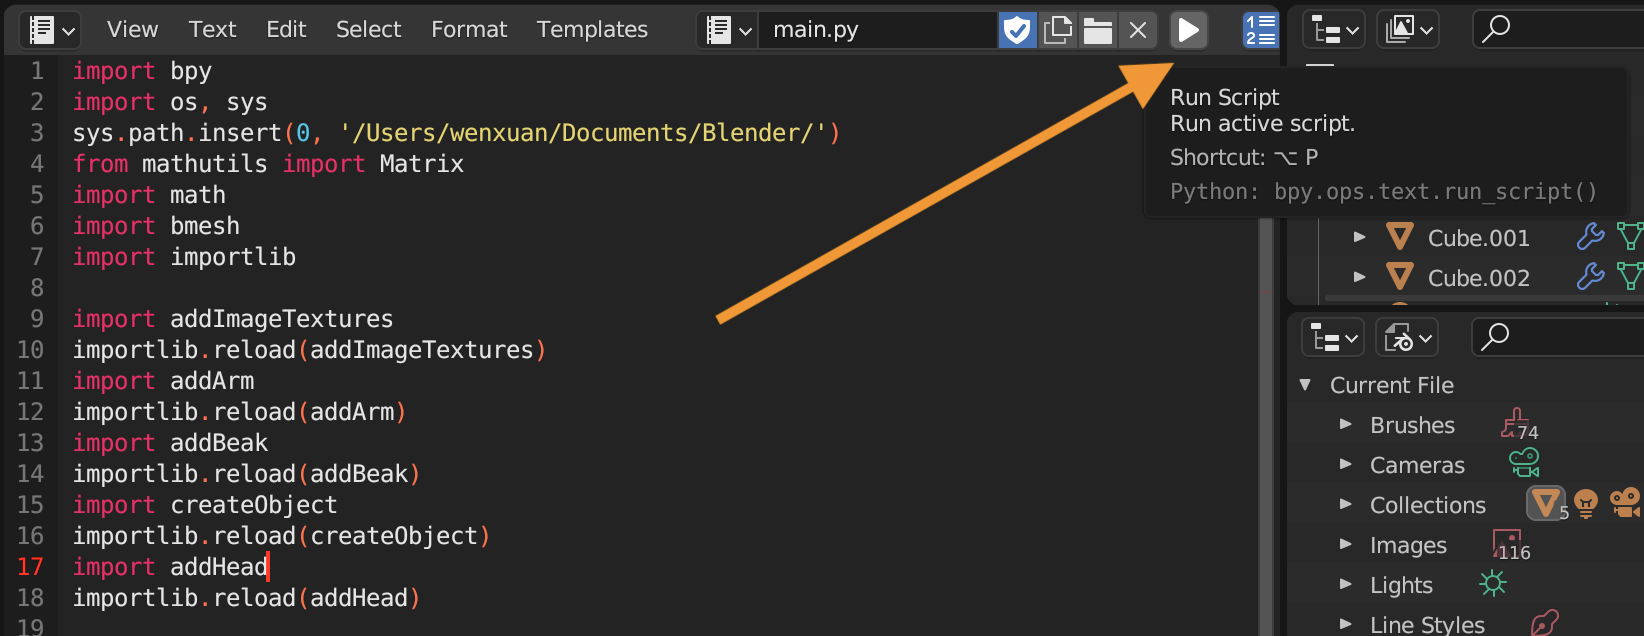
Now you can load scripts to it! Click Open Text button:
 And run it by clicking the Run button .
When you run the script for the first time, you have to run all dependent scripts (imported scripts).
Basic Intro to Blender
There are many, many online materials for learning Blender, for example:
Blender Guru
Blender Official Youtube Channel
Blender Official Doc
There are few key concepts you need to know:
- Python Coding in Blender
- Node
- UV Mapping
- Bake
- Render
- FBX & PNG file
Basic Intro to Blender Python
One of the key features of Blender is its support for Python scripting, which allows users to automate tasks and create custom tools. In this post, we'll provide a basic introduction to Blender Python, including how to access and manipulate objects, create custom operators, and more.
Let's start by creating a basic mesh object: a sphere:
bpy.ops.mesh.primitive_uv_sphere_add(radius=5.0, location = (0,0,0))
sphere = bpy.context.active_object
sphere.name = 'Sphere'
One of the most common tasks in Blender is accessing and manipulating objects. With Python, you can easily select, move, rotate, and scale objects in your scene. Here's an example of how to select an object by name and move it along the x-axis:
import bpy

# Select object by name
obj = bpy.data.objects['Sphere']
# Move object along x-axis
obj.location.x += 1.0
As you noticed, object on the scene can be selected by bpy.context.active_object (select the last operated object) or bpy.data.objects['Sphere'] (select by name).
Another important function is Node, here is an example using node to add image texture on the object:
import bpy

# Load an image texture
image_path = "/path/to/your/image.png"
image = bpy.data.images.load(image_path)

# Create a new material
material = bpy.data.materials.new("ImageTextureMaterial")
material.use_nodes = True

# Access the material's node tree
node_tree = material.node_tree

# Add an image texture node
image_texture_node = node_tree.nodes.new("ShaderNodeTexImage")
image_texture_node.image = image
Connect with your workflow
One of the most powerful ways to connect Blender with your workflow is by running Blender outside of its GUI. This allows you to automate tasks, integrate Blender into your existing workflow, and use Blender as a rendering engine. One example of this is connecting Quaddle Generator to your MATLAB workflow. By doing so, you can generate stimuli without the need for a graphical interface, streamlining the process and making it more efficient.
You simply need to add following lines:
% Make Quaddle
export_png = 'True';
export_fbx = 'False';
blender_path = '/Applications/Blender.app/Contents/MacOS/Blender'; % Change this to your Blender path
blender_file_path = '/Users/wenxuan/Documents/Blender/makeQuaddle.blend';
python_script = '/Users/wenxuan/Documents/Blender/parser.py'; % Change this to your Python script path
input_path = iPath;
output_path = [iPath '/'];
command = sprintf('"%s" --background "%s" --python "%s" -- --input_path "%s" --output_path "%s" --export_fbx "%s" --export_png "%s"', blender_path, blender_file_path, python_script, input_path, output_path, export_fbx, export_png);
system(command);